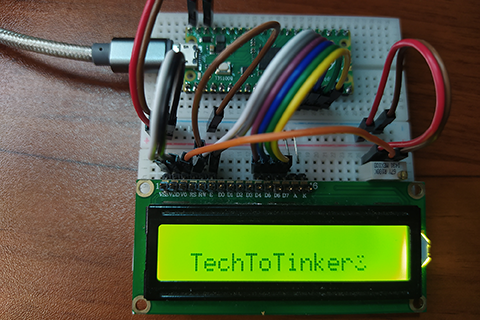
002 – Raspberry Pi Pico: LCD 4-bit Mode
In this article, we will learn on how to use the 16×2 LCD module in 4-bit Mode with MicroPython language. For this tutorial, we will used a Raspberry Pi Pico with MicroPython firmware.
In this article, we will learn on how to use the 8×8 Dot Matrix display with an I2C communication interface using the MicroPython language.
In this article, we will look at the 8×16 Dot Matrix Display with SPI as communication interface. This is basically the continuation of the previous tutorial on how to use the 8×8 Matrix Display.
In this article, I would like to share to you on how to create this simple yet cool project using a single 8×8 dot matrix module to display a binary clock – a clock that is represented using binary numeric system.
In this tutorial, we will learn on how to use an 8×8 Dot Matrix Display with SPI protocol as communication interface. For this tutorial, I will be using the 8×8 Dot Matrix Display module with SPI protocol from GorillaCell ESP32 development kit.
In this article, I would like to share to you the results of my exploration with the basic GPIO of the Raspberry Pi Pico using the MicroPython language.
In this tutorial, we will look at 1.3 inch OLED display using MicroPython. It uses an SH1106 driver chip. It has a monochrome display resolution which is 128×64 pixels.