How to Use LCD Keypad Shield for Arduino
Table of Contents
In this tutorial, we will learn on how to use the LCD Keypad Shield for Arduino. This shield is compatible for Arduino Uno and Arduino Mega.
PINOUT
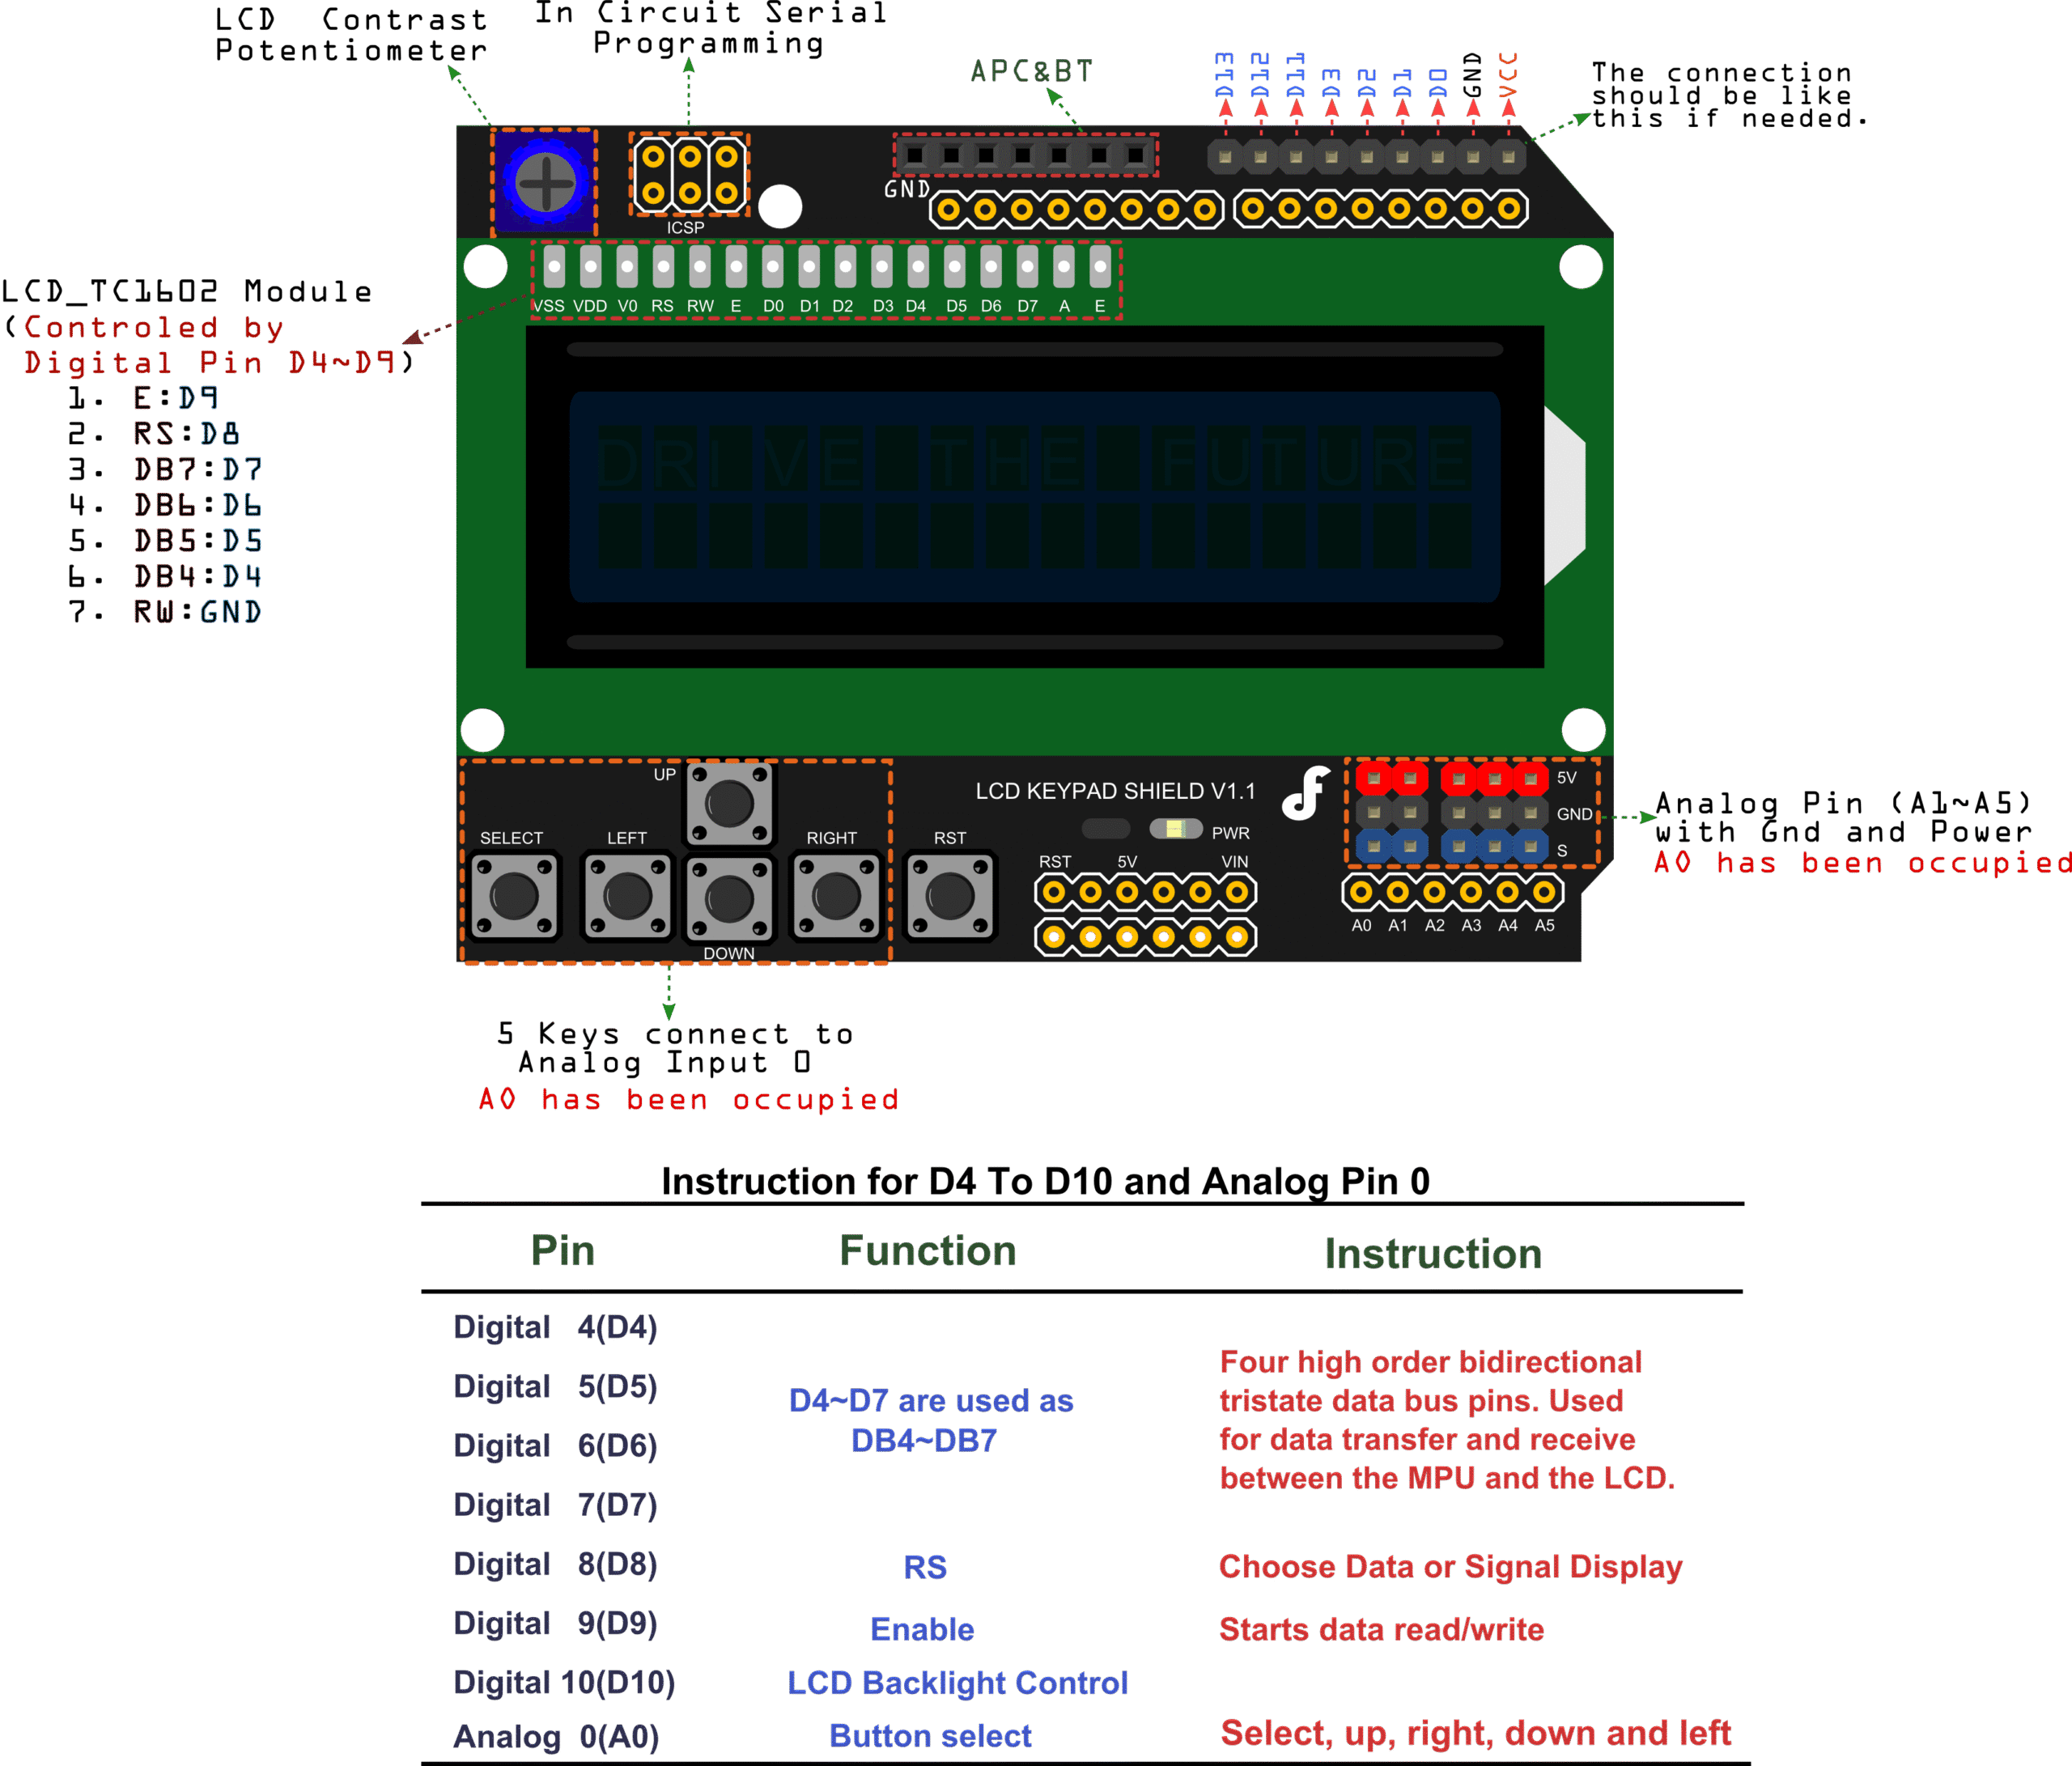
From these pin assignments, we can conclude that the following pins are free and available for other purposes:
- Digital pins: 0, 1, 2, 3, 11, 12, and 13
- Analog pins: A1 to A5
VIDEO DEMONSTRATION
SOURCE CODE
#include "LiquidCrystal.h"

LiquidCrystal lcd( 8,  9,  4,  5,  6,  7);

void setup() {
 lcd.begin(16, 2);

 lcd.setCursor(0,0);
 lcd.print("  TechToTinker  ");

 lcd.setCursor(0,1);
 lcd.print("Press Key:");

}
void loop() {
 int x;
 x = analogRead (0);

 lcd.setCursor(10,1);

 if (x < 60) {
   lcd.print ("Right ");
 }
 else if (x < 200) {
   lcd.print ("Up    ");
 }
 else if (x < 400){
   lcd.print ("Down  ");
 }
 else if (x < 600){
   lcd.print ("Left  ");
 }
 else if (x < 800){
   lcd.print ("Select");
 }

}
CALL TO ACTION
If you find this tutorial helpful, like and share this to your friends who might benefit from it.
Thank you and have a good day.
×
![]()
Thanks, very helpful. Works great.
@Jim, I am glad that you liked it. Thank you.
Thanks it great help for me
I am happy that it helps you. Cheers.